TPMS Knowledge
OBDII Relearn Issues
Ensure the process is being performed in the correct sequence
This is among the most common issues for an OBDII relearn failure though it will only affect particular make/model/year vehicles. Please ensure when performing an OBDII relearn to do so in the following sequence.;
- Power on the device and select your make/model/year vehicle
- Scan all sensors in the correct sequence (as indicated on the tool)
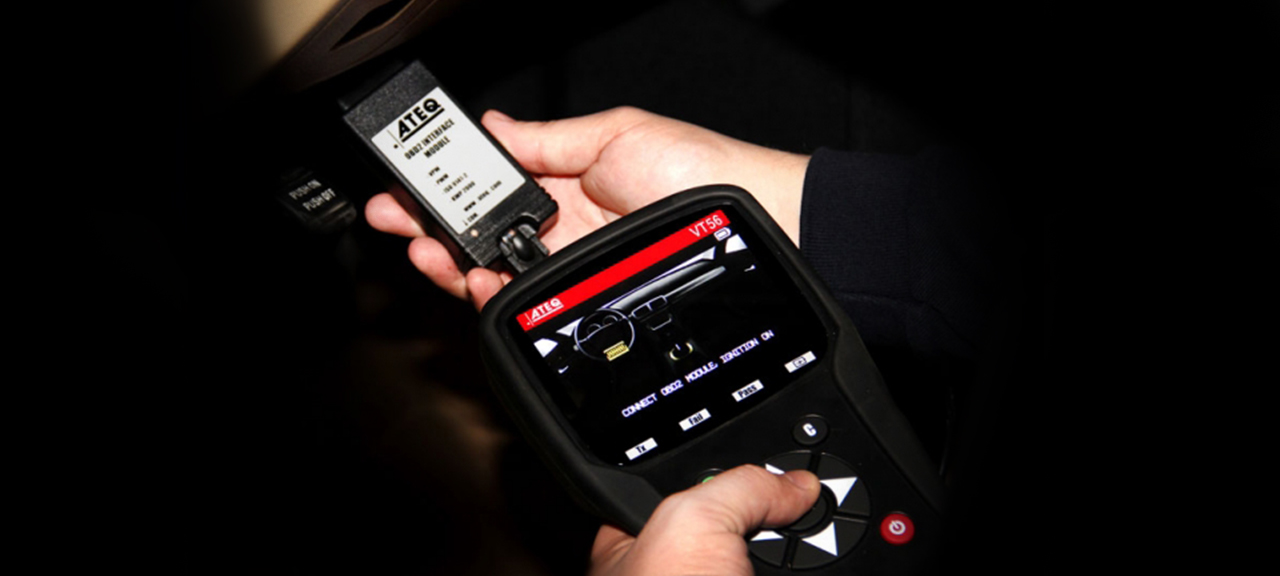
- Connect the OBDII module to the tool via the RJ45 cable (if the connection is secure then the display will show an OBDII icon in the upper left hand corner and the light on the module will illuminate)
- Turn the vehicle to the ON position with the engine OFF (please note certain vehicles have more than one mode where the battery is on while the engine is off, as such you may need to try both of these settings to find which one is the proper ON position)
- Connect the module to the OBDII port on the vehicle
- Follow the prompts to complete the relearn
Ensure the OBDII connection is secure (particularly for Honda/Acura vehicles)
Certain Honda and Acura vehicles, particularly the older models, appear to have OBDII connections ports which were molded slightly too short and consequently they provide a poor connection. To address this issue please apply upward pressure to the module while performing the OBDII relearn.
Is the vehicle a Toyota or Lexus? If so an ECU unlock may be required.
On Toyota and Lexus vehicles you will want to verify if there is a main/2nd switch, if there is then please ensure it is set to main. These vehicles also contain a SET or RESET button which if pressed can cause the ECU to become stuck in a closed loop. To correct this please select the ECU unlock option from the SERVICE menu and complete the application.
Clear any outstanding DTCs
Any outstanding DTCs on the vehicle can cause a relearn to fail. To clear any outstanding DTCs select the application from the SERVICE menu.
Manual Relearn
While the vehicle’s horn chirps, indicating the sensor has been triggered, the tool fails to receive a response from the sensor or vis versa.
This is the most common issue experienced with manual relearns. Either the vehicle responds to the trigger of a sensor with a horn chirp while the tool fails to receive a response or the tool receives a response while the horn fails to chirp. The cause of this issue is entirely related to the type of sensor and the particularities of the vehicle in question and is usually unrelated to the tool. When the tool triggers a sensor it causes the sensor to send out two responses, one to the ECU and another back to the tool. Normally the cause of this issue is either that the tool is being removed before it can receive the sensors response or the ECU is too far away from the sensor for the signal to transmit properly. This can be addressed by rolling down the windows or moving the vehicle slightly forward/backward to re-adjust the position of the sensor relative to the ECU.
Programing Aftermarket Sensors
Com Error
A com error or communication error is an indication that the tool’s signal has failed to communicate with the sensor. This is most often caused by signal interference due to either competing RF signals
(often from other nearby sensors) or structural impediments preventing clear communication. The easiest and most common solution is to relocate to an area with less signal interference or even to simply point the antenna and sensor in a different direction from that in which they were being pointed previously.
Verification Error
This error is received when the protocol the tool is verifying fails to match that which it has captured. This is normally database related and as such the best solution is to contact customer support to investigate an immediate work around or update the tool is you are not on the latest software version (the newest software version will be displayed in WebVT when your tools is connected).
No Sensor Detected
As indicated in the message, this error is received when the tool is incapable of detecting any sensor. This is most often due to an incorrect sensor selection, an incorrect selection of the make/model/year, a defective or dead sensor or a hardware issue of some kind with the tool (if the issue is hardware related then this message will appear for every sensor you attempt to scan). The most common solution for this error is to change sensors.
* For all sensor related concerns it is important to ensure that you are holding the tools properly in relation to the sensors. Whenever holding a tool up to a tire ensure that the antenna is line up with the side wall of the tire, at the base of the valve stem.*